
Configure the ReAct AI assistant
Turn ReAct on and control how bold it is with changes.
What this is for
ReAct is the AI assistant built into Sign OS. These settings check the assistant is connected for your shop and control how careful it is with changes — from confirming every action, to running writes immediately.
Before you start
- You are signed in as an admin.
Step by step
- 1
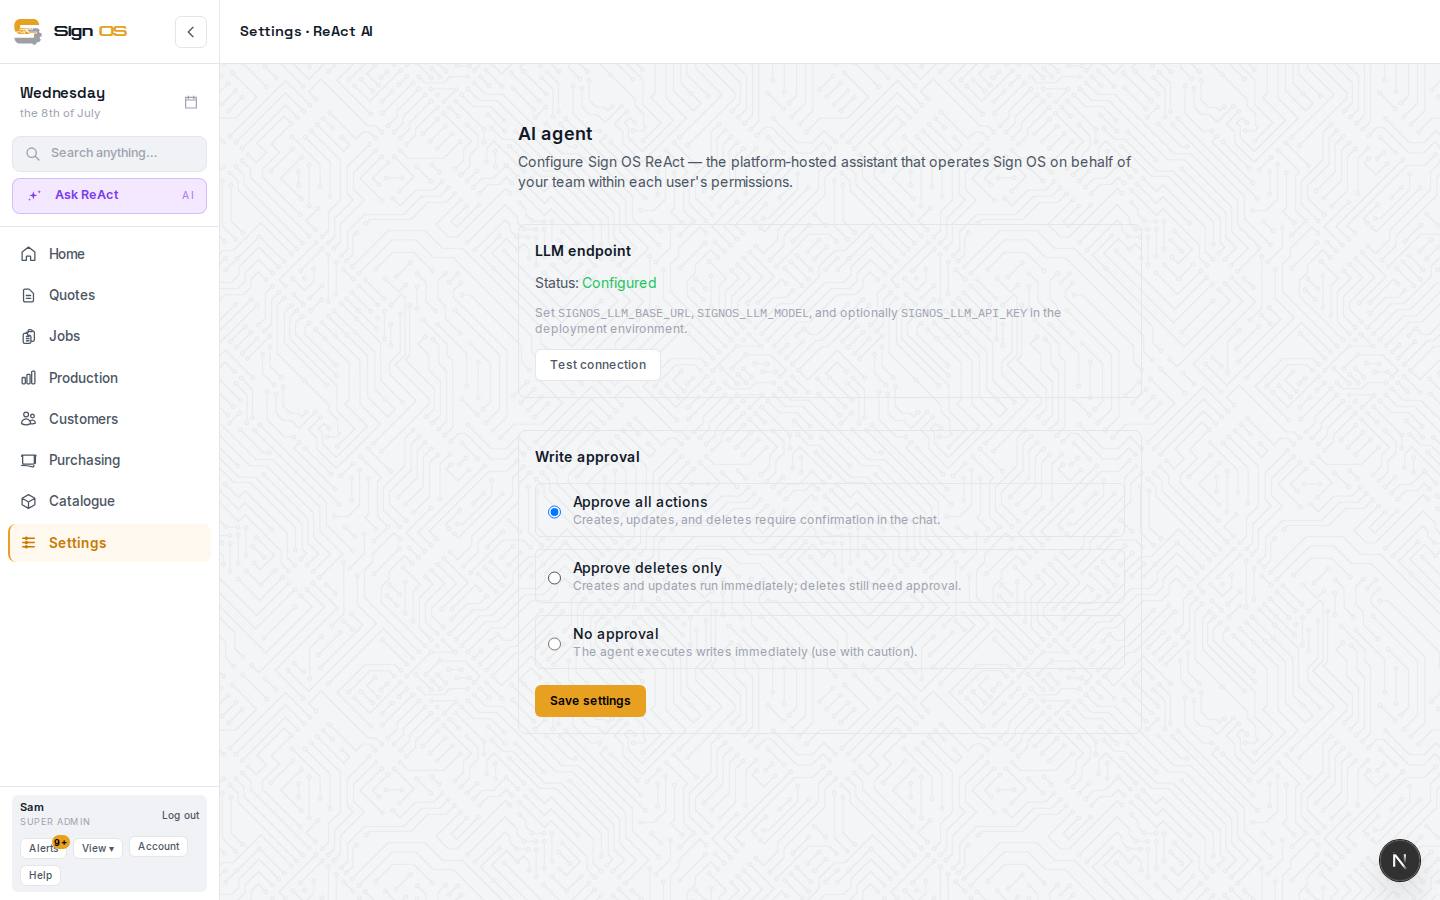
Open Integrations → ReAct AI (the page is headed 'AI agent').
- 2
Under 'LLM endpoint', check the status reads 'Configured', then click Test connection to confirm it responds.
- 3
Under 'Write approval', choose how much ReAct can do on its own: Approve all actions, Approve deletes only, or No approval.
- 4
Click Save settings. ReAct now works to those rules for your team.
Tips & gotchas
- Start careful — leave it on 'Approve all actions' so you confirm each change — then loosen the reins as you trust it.